Project calculates the costs for resources based on pay rates, per-use fees, fixed costs, or totals for cost resources (such as airfare or dining) that are assigned to tasks.
Note: Before you can save changes to cost information for an enterprise resource, the resource must be opened for editing.
What do you want to do?
Enter cost rates for a work resource
-
Choose View > Resource Sheet.

-
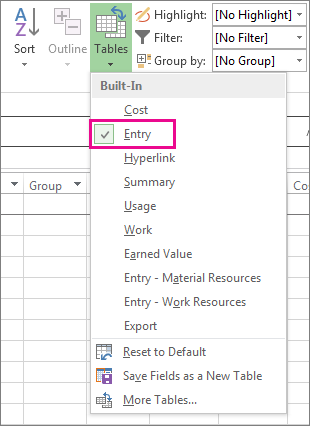
If you don’t see the Entry table, click View > Tables > Entry.

-
In the Resource Name field, type the person’s name, or select the name if that person is already in the resource sheet.
-
In the Type field, make sure that Work is shown.

-
In the Std. Rate field, type the standard pay rate for that person. For example, $25.00/hr, or $200.00/day.
Press Tab to move to this field if you don’t see it.
-
If you plan to track overtime in your project, and your person can work overtime, type the overtime rate in the Ovt. Rate field.
-
In the Accrue field, cost accrual is Prorated by default, but you can pick Start or End to accrue rate-based resource costs at the start or end of the project.
-
Assign the resource to a task. Microsoft Project automatically calculates the resource cost for that assignment.
Tip: To enter more than one rate per resource, see Enter variable rates for people or material resources at the end of this article.
Got rates more complex than that? Sometimes, a single set of resource rates isn't enough to capture complex billing schemes ("blended rates").
For example, a resource may have variable rates that depend on:
-
Type of work
-
Work location
-
Volume discounting arising from the work
-
Change, over time
-
Resources used, such as trained vs. talented
You can model these more complex billing schemes by using rate-table features in Project:
-
Double-click the resource to open the Resource Information dialog box, and then click the Costs tab.
-
Under Cost rate tables, on the A (Default) tab, enter the date when the rate change takes effect in the Effective Date column.
-
In the Standard Rate and Overtime Rate columns, type the resource rates.
-
To enter a rate change that takes place on another date, in the additional rows of the cost rate tables, type or select the new date, and the new standard rates and overtime rates.
-
To enter additional sets of pay rates for the same resource, click the B tab, and then repeat steps 2-4.
Notes:
-
Use cost-rate tables to reflect rate changes that kick in after a certain date. This will avoid old data being calculated.
-
If you're using cost-rate tables on a regular basis, add the Cost Rate Table column to the Task Usage view to see and select the assignment’s rate table.
-
Project calculates cost totals when rate-based resources, resources that have per-use costs, and cost resources are assigned to tasks. The resources’ Accrue at setting will have an impact on this.
-
Changing the standard rate for a resource affects the cost of tasks that are 100% complete and that have the same resource assigned to them.
-
When you have entered multiple rates for a single resource by using the cost rate tables, you can change the resource rates for that resource for any assignment by using a different cost rate table. To change the cost rate table for a specific assignment, in the Task Usage view, select the resource that is assigned to the task, then right-click to select Information. On the Costs tab, in the Cost rate table list, click the cost rate table that you want to use.
Enter a per-use cost for a work resource
-
Choose View > Resource Sheet.

-
If you don’t see the Entry table, click View > Tables > Entry.

-
Fill out the Cost/Use column for the resource that has a set fee for each assignment. Resources can have a cost per use in addition to rate-based pay.
You can enter more than one per-use cost for each resource to reflect blended-rate schemes:
-
Double-click the resource to open the Resource Information dialog box, and then click the Costs tab.
-
Under Cost rate tables, on the A (Default) tab, enter the date when the rate change takes effect in the Effective Date column.
-
Fill out the Per Use Cost column.
-
To enter a per-use cost that takes place on another date, in the additional rows of the cost rate tables, type or select the new date and the new per-use cost.
-
To enter additional sets of costs for the same resource, click the B tab, and then repeat steps 2-4.
Tip: The Cost Accrual value is not specific to any cost-rate table, as it is a resource-level property.
Project can calculate cost totals when rate-based resources, resources that have per-use costs, and cost resources are assigned to tasks.
Notes:
-
When you have entered multiple costs for a single resource by using the cost rate tables, you can change the resource costs for an assignment by using a different cost rate table. To change the cost rate table for a specific assignment, in the Task Usage view, select the resource that is assigned to the task, then right-click to select Information. On the Costs tab, in the Cost rate table list, click the cost rate table that you want to use.
-
If you're using cost-rate tables on a regular basis, add the Cost Rate Table column to the Task Usage view to see and select the assignment’s rate table.
Enter a fixed cost for a task or for the project
Fixed costs are assigned to a task and are useful for planning and capturing task cost that arise in addition to those arising from the assigned resources. Fixed costs are applied to a task, and not to a resource.
-
Choose View >Gantt Chart.

-
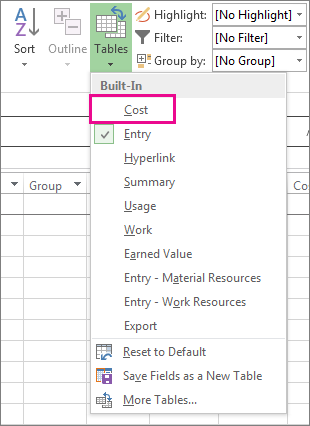
Choose Tables > Cost.

-
In the Task Name field, select the task that has a fixed cost.
-
In the Fixed Cost field, type a cost value.
Tip: You can use the Fixed Cost Accrual value to control when fixed costs are realized, and you can use Use Cost Resource assignments for finer control of costs.
You can also enter fixed costs for the entire project, which you might choose to do if you are interested only in overall project costs (and not in task-level costs), or if you want to add project overhead costs (such as the cost of utilities).
-
On the Format tab, select the Project Summary Task check box.

-
Type a cost for the project in the Fixed Cost field for the project summary task.
Enter costs for a cost resource
A cost resource lets you apply a cost to a task by assigning a cost item (like a capital expenditure on equipment, or variable costs such as airfare or lodging) to that task. Unlike fixed costs, you can apply any number of cost resources to a task. Cost resources give you more control when you apply various types of costs to tasks.
Before you enter a cost for a cost resource, you must create the cost resource:
-
Choose View > Resource Sheet.

-
In the Resource Name field, type a name for the cost resource (such as Lodging), and then right-click to select Information.
-
In the Resource Information dialog box, on the General tab, select Cost in the Type list, and then click OK.
After the cost resource is created, you can assign the cost resource to a task. After the cost resource is assigned to a task, you can enter costs for the resource assignment by using the Task Usage view.
-
Choose View > Task Usage.
-
Double-click the task that the cost resource is assigned to, to open the Task Information dialog box.
-
Click the Resources tab, enter a cost value in the Cost field, and then click OK.
When a cost is applied by using a cost resource that is assigned to a task, the amount of the cost resource can vary depending on how the cost resource is used.
Notes:
-
Unlike fixed costs, cost resources are created as a type of resource and then assigned to a task.
-
Unlike work resources, cost resources cannot have a calendar applied to them. However, if you assign a cost resource to a task and add a currency value on a specific date that falls outside of the task's current start or end date, Project adjusts the date to include the date of the cost resource assignment. For example, if you have a task that begins on August 1 and ends on August 15, and you assign a cost resource with a value of $500 on August 21, the end date of the task is adjusted to August 21, to reflect the cost resource assignment.
-
If you have estimated multiple values for a cost resource over a period of time, and the actual values differ from the estimates, Project replaces the estimates with the actuals. This cost resource behavior differs from other resource types because cost resources are not tied to actual work.
-
The currency value of cost resources doesn't depend on the amount of work done on the task that they are assigned to.
-
Costs entered into a project schedule are not as protected as those entered into a project accounting system. There are situations when costs may change, based on changes to the owning task. If the task duration is changed, it is possible that the cost distribution, over time, will change.
Enter a rate for a material resource
-
Choose View > Resource Sheet.

-
If you don’t see the Entry table, click View > Tables > Entry.

-
In the Resource Name field, select a material resource or type a new material resource name.
-
If this is a new material resource, do the following:
-
Select Material in the Type field.
-
Type a measurement-unit name in the Material field, such as lit (for liters), cu. m (for cubic meters), or ea (for each).
-
-
In the Std. Rate field, type a rate.
You can enter more than one rate per material resource:
-
Double-click the resource to open the Resource Information dialog box, and then click the Costs tab.
-
Under Cost rate tables, click the A (Default) tab, and then type a rate in the Standard Rate column.
-
In the next row, type a value or percentage change from the previous rate in the Standard Rate column. For example, type +10% to indicate that the rate has increased 10% from the previous rate.
-
In the Effective Date column, enter the date when the rate change takes effect.
-
To enter additional sets of rates, click the B tab, and then repeat steps 2-4.
Notes:
-
Enter material resource rates if you want Project to calculate material resource costs based on material resource rates. For example, to assign to a task a material resource named cement that has a unit price of $100 per ton, in the Type field select the resource type Material, and then type or select the resource name Cement, the label Ton, and the standard rate of $100.
-
Enter multiple rates for a material resource if you work with multiple grades of material or if you need to incorporate material rate changes on specific dates. For example, you can use the Cost rate table tabs to enter rates for various grades of carpet and to include cost increases or discounts that you expect at specific times during the project.
Enter a per-use cost for a material resource
-
Choose View > Resource Sheet.

-
If you don’t see the Entry table, click View > Tables > Entry.

-
In the Resource Name field, select a material resource or type a new material resource name.
-
If this is a new material resource, select Material in the Type field.
-
If this is a new material resource, type a measurement unit name in the Material Label field, such as lit (for liters), cu. m (for cubic meters), or ea (for each).
-
In the Cost/Use field, type a cost value.
You can enter more than one per-use cost for each resource:
-
If this is a new material resource, select Material in the Type field.
-
Type a measurement-unit name in the Material box.
-
Double-click the resource to open the Resource Information dialog box, and then click the Costs tab.
-
Under Cost rate tables, click the A (Default) tab, and then type a cost value in the Per Use Cost column.
-
In the next row, type a value or percentage change from the previous cost in the Per Use Cost column.
-
In the Effective Date column, enter the date when the cost change takes effect.
-
To enter additional sets of per-use costs, click the B tab, and then repeat steps 4-6.
Notes:
-
Enter one per-use cost for a material resource if you want to enter only one per-use cost for that material resource and you don't want to incorporate future cost changes.
-
Enter multiple per-use costs for a material resource if you want to enter more than one per-use cost for that resource or to incorporate future material cost per-use changes.
Enter actual costs manually
You want to enter actual costs, but you find out that you can’t do that. That’s because Project automatically calculates actual costs based on the actual work accumulated or materials consumed on tasks.
You can enter actual costs on assigned tasks that have been completed (remaining work is zero) in any view that has a cost table applied.
To enter or edit actual costs manually when work is still in progress, turn off the automatic calculation of actual costs.
-
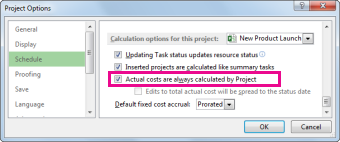
Choose File > Options > Schedule.
-
Under Calculation options for this project, clear the Actual costs are always calculated by Project box.

Troubleshooting
Problem: The resources that are assigned to your project task have associated costs, but the total costs for your resource assignments show a zero value.
Cause: The wrong cost rate table may be applied to your task.
Resolution:
-
Check that all resources are assigned to tasks. Note that costs are calculated only after resources are assigned to tasks.
-
Check the cost rate table that you have applied to the task. A cost rate table that does not contain rates may have been applied. You can change the cost rate table for the resource assignment.
-
Choose ViewTask Usage.
In the Task Usage view, resources are grouped by the tasks they are assigned to.
-
Double-click the resource who is assigned to the task for which you want to verify its associated cost rate table.
-
In the Assignment Information dialog box, in the Cost rate table list, verify that the cost rate table is the correct one for the task.
-
Problem: After entering cost rates and fixed costs for resources, you are unable to enter the actual costs.
Cause: By default, Project automatically calculates actual costs according to the actual work accumulated or material consumed on tasks. If you want to edit actual cost information, you need to turn off the automatic calculation of actual costs.
Note: If the assignment on a task is completed (remaining work is zero), actual costs for the assignment can be entered in any view that has a cost table applied.
Resolution:
-
Choose File > Options >Schedule.
-
Clear the Actual costs are always calculated by Project check box.


