When you add a modern page to a site, you add and customize web parts, which are the building blocks of your page. This article describes the Divider web part.
With the Divider web part, you can add a horizontal line between other web parts to help divide up your page and make it easier to read.

Add the divider web part
-
If you're not in edit mode already, click Edit at the top right of the page.
-
Hover your mouse above or below an existing web part or under the title region, click

Customize the divider web part
-
Click Edit web part

-
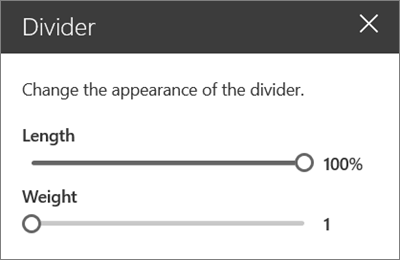
Set the Length of the divider from 20% - 100%. (The divider's length will change as you drag the slider, so you can preview the change.)
-
Set the Weight of the divider from 1 (thinnest) to 6 (thickest). (The divider's weight will change as you drag the slider, so you can preview the change.)

Delete the divider web part
-
If you're not in edit mode already, click Edit at the top right of the page.
-
Select the Divider web part, and then click the Delete web part button


